
Look I understand the temptation to start a bonfire with gas. Gasoline is flammable, it lets you off the hook for setting up a perfect burn pile, it gets a bonfire party started quickly. It’s also a horrificly bad idea.
You don’t need to be a survival genius to learn how to start a bonfire without gas.
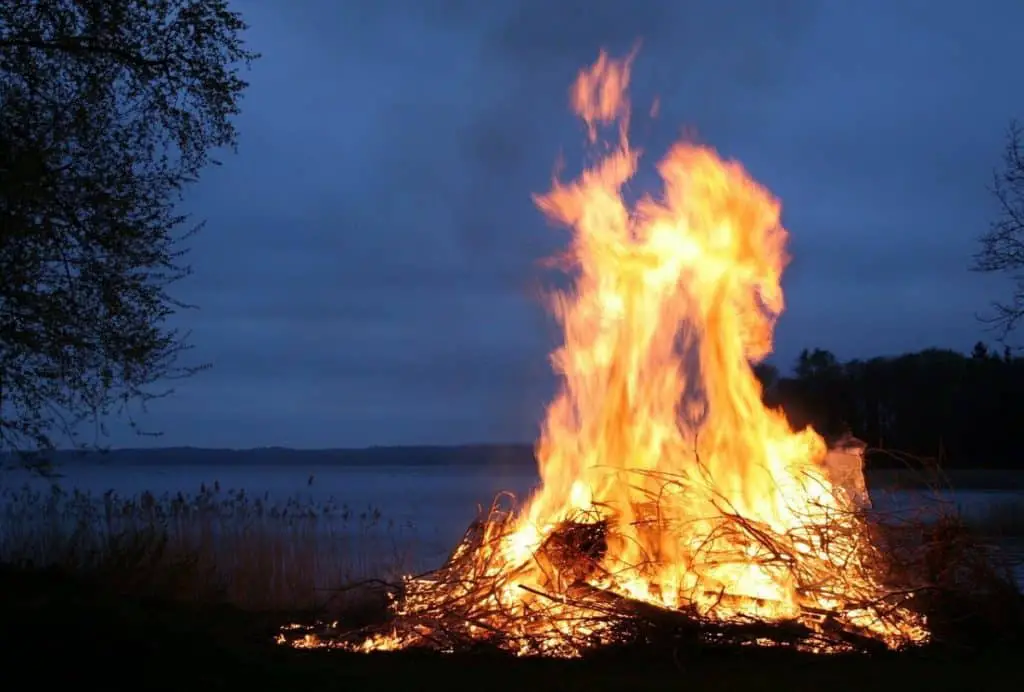
Proper setup makes starting a bonfire easy without gas or other accelerants. Starting a bonfire without gasoline or other accelerants is about smart preparation, setup, and a good fire starter surrounded by dry twigs, bark, hay, or other tinder. Starting a bonfire is just like starting a regular campfire, only scaled up.
Need advice on a better fire starter or how to construct a stable bonfire structure? Keep on scrolling – I never tire of talking about fire 🙂
Starting Bonfires Like a Seasoned Pro
The key to lighting a bonfire is the setup. Usually if someone is resorting to gasoline it’s because they toss a pile of wood or rubbish together and just want to toss some matches and be done with it.
Not only is this more dangerous than a properly prepared bonfire, but they tend to be weaker, as well. This is how you get fires that burn out the middle and not the edges.
Whether you use much accelerant or not, that should be part of the setup. Not even things like lighter fluid should be added to an open flame.
However if scouting taught me anything it’s that you always have the ability to start a fire in any weather or situation if you take the right first steps to prepare it.
Preparing the Bonfire Base Is Key
Most of the work on a successful bonfire starts before the first match is ever struck. The more you prepare, the easier lighting a bonfire without gas is. This isn’t actually a huge challenge as long as you set up right.
Gasoline, aka “Scout Water,” is cheating. Any self-respecting outdoor enthusiast or backyard warrior is up to the challenge of making a large but safe bonfire that everyone can enjoy.
Step #1: Prepare a Fire Pit
If there is a fire pit already prepared then that makes this step particularly easy. You keep the size of the bonfire to the size that the fire pit allows for. After all, safety, must come first.
If you don’t have a set fire pit, you need to make one. Safety needs to come first and even beyond the safety, a good fire pit also allows a bigger and more controlled fire.
Creating Your Own Bonfire Pit
If you need to start from scratch a good bonfire pit is going to be fairly sizeable. Most of mine are at least 6 feet by 6 feet and sometimes even up to eight. This might seem like overkill if you’ve never built a fire pit before, but it really isn’t.
Bonfires need space not only for the initial setup but also room to shift and breakdown without being a danger to the ground, trees, landscaping, or people around.
Part of preparation means having fire extinguishers and water close by, but at a far enough distance away that if the fire shifts and falls over unexpectantly that it doesn’t cover your buckets of water or the extinguisher (trust me on this one, you don’t want a contained fire extinguisher set on fire).
By having a safe setup for a bonfire you are set not only for this particular fire, but for any future fires after that, as well.
Step #2: Gather Your Bonfire Tinder
A good bonfire requires a lot of tinder because you need to get a very good fire going to need to make sure you have a solid initial flame. Enough to make sure that everything catches.
You need very dry tinder that catches well, and ideally a variety of common tinder items like shaven dry bark (especially birth bark if available), newspaper, paper towels, paper cup of sawdust, dry weeds or hay, etc.
A good layering of tinder means you can start the fire with materials that will light easily and grow into a bigger flame quickly. A couple handfuls of loose tinder once the initial flame is lit to put on top and then you can place the missing pieces over the top.
Having more than enough tinder to get started is crucial to making sure you can start a raging bonfire without dangerous use of gasoline.
Step #3: Gather Supporting Fuel for Bonfire
Whether you’re stacking up a giant tepee you intend to keep feeding or a giant log cabin fire, you want to make sure you have enough. Gasoline doesn’t need to be a part of that, nor should it be.
By supporting fuel I mean sticks, branches, and logs of a variety of sizes. As the fire is starting you want smaller, thinner pieces of dry wood that are going to catch more quickly. Then burn through faster, as well.
Once the starting part of the bonfire hits a critical mass, then the larger and thicker pieces of wood can be tossed on.
The key is to have plenty starting out. In fact, you would definitely rather have too much extra wood to toss on the bonfire rather than not enough.
Step #4: Create the Perfect Firestarter for Your Bonfire
This is one case where bigger is better. While a small scrap of paper might be enough for a small campfire in perfect conditions, if you want a big bonfire you don’t want a disappointing little burnout at the center.
A good fire starter for a bonfire is one that not only lights quickly and easily with a single match, but one that has a little bit of burn time, as well. This gives the time needed for surrounding tinder and the base fuel you’ve set up to catch.
You want to make sure that starting light is a solid fire that has some legs to it. As long as this is the case, that bonfire is going to light with no problem at all.
One of my favorites is newspaper with shredded ends, sprayed with vegetable oil cooking spray that is allowed to dry. Use in a crumpled pile, or bouquet flower type of setup and you won’t have a problem getting a fire going.
Wrapped newspaper dipped in candle wax and with a good chunk of twine is another excellent option. This doesn’t get quite the flame size of the newspaper bouquet but it does offer a very long steady burn that makes for a great base for everything around it.
One thing to consider is access to the center of the bonfire. Sometimes you will have a hard time reaching the center because of how you need to build that. If this is the case, you need a sort of torch you can use to light your fire starter in the middle.
Step #5: Create Your Tepee or Log Cabin Setup
For campfires I usually go with log cabin, but for bonfires I may go tepee method just as much. You can scroll further down for my thoughts on both, but the big thing is to know how you’re going to light your bonfire and how it’s going to be setup safely to breakdown in a way that keeps the fire contained.
If you are familiar with one style over another than go with that. A good log cabin setup with the largest pieces at the base and a slight narrowing, almost in a Mayan pyramid is my personal favorite, but there are plenty of times I’ll choose to go for the tepee method instead.
This is the base that you need for a safe and successful bonfire. All without the “help” of dangerous gasoline and the burn accidents and/or explosions that often come with them.
If you’re still not 100% clear on starting a fire this Art of Manliness article is pretty solid in helping to illustrate the setup.
Step #6: Practice Fire Safety
Water and fire extinguishers should be close by. If this is a backyard, we have a garden hose situation, make sure that the length of the hose and the spray is enough to contain a fire if it falls over and out of the pit/burn area.
These are details that need to be worked out before the first kindling is even placed so you know beyond a doubt that you are in good shape in even the worst case scenarios.
Keeping gasoline out of the mix also means that water works fine without complications and you don’t have to worry about freakish occurrences like the water spreading the burning gas fire.
Actually Lighting Your Bonfire
A major part of this depends on what method you used to build your fire. The best place to start a bonfire is in the middle to make sure it’s a central burn. This not only makes a better bonfire, but prevents the issue of half of a bonfire setup burning and the other half not.
This situation not only leads to less impressive bonfires but it can also lead to less safe situations where shifting can take place and the fire doesn’t just just break down on itself.
The Organized Bonfire
This is the more common reason most people will be looking for information on starting a bonfire. Don’t use gasoline – you will be liable if anyone else gets injured due to your actions.
Instead, using the tips above with proper preparation, types of wood, and a pre-prepared fire starter with only approved accelerants and you’ll be able to create an awesome backyard bonfire that will be the perfect center of festivities.
The extra prep time and safety can lead to an awesome fire. That preparation also takes away the extra pressure that you might feel to rush getting the fire going. That should take away any potential pressure to use gasoline and keep you with the smart ways of getting a raging bonfire going.
The Giant Rubbish Heap Bonfire
This is more challenging because you’re not looking at starting a giant bonfire for having friends over or a big celebration/cookout. You’re looking to burn a lot of extra stuff that isn’t easily disposed of, some of which may not burn well or can be a touch toxic.
Look, I grew up in extreme rural areas. No judgement, sometimes this is absolutely the only way.
In these situations you are probably going to be tempted to use gasoline. Don’t. You should never start fires with gasoline. However, if there is the type of non-wood, non-conventional burnable trash that needs to be burned then you may want an accelerant to help.
Still, gasoline is not the answer.
Lighter fluid is a viable option. Another option is to spray vegetable oil on paper towels and use those towards center with the most naturally burnable stuff to make a conventional fire – only bigger.
Create a Safe Rubbish Burn
You want to make sure the burn pile is nowhere near your house or any structures on the property. This should be an area free of grass and preferably with a dug pit, if you can manage.
In addition to that slight hole or indentation into the ground you should surround the burn pit with stones, cinder blocks, or something similar to help keep any fire more contained within an area so it doesn’t spread outside of the safe burn zone.
You also want to be careful of how high you stack things and make sure it’s not more than you can safely handle.
Make sure to have water buckets, hose, and/or fire extinguishers on hand. Preferably more than one just to make sure you’re covered. It is always better to be prepared for the worst case scenario and not need any of the precautions rather than vice-versa.
In Conclusion
For some fire and camping novices the idea is a bigger fire needs a bigger bang to get started, but nothing could be further from the truth! Good fire starting skills work on fires of all sizes.
Follow these tips, hone your bonfire fire starting skills, and your next celebration will be safe, fun, and memorable. What more can you hope to ask for?
Other articles you may enjoy…